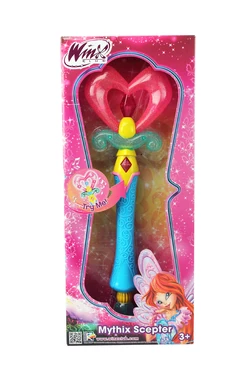
The Ultimate Guide To Winx Club Mythix Scepter Making
Have you ever wondered how to create your own Winx Club Mythix scepter? The magical world of Winx Club has captivated fans worldwide with its enchanting characters and their powerful Mythix scepters. These mystical weapons are not just props; they're symbols of transformation and power that have inspired countless fans to create their own versions. Whether you're a dedicated Winx Club enthusiast or a crafting hobbyist looking for your next project, this comprehensive guide will walk you through everything you need to know about making your very own Mythix scepter.
The History and Significance of Mythix Scepters
The Mythix transformation is one of the most iconic forms in the Winx Club universe, introduced in the sixth season of the animated series. During this transformation, each fairy receives a unique scepter that serves as both a weapon and a tool for casting powerful spells. These scepters are characterized by their elegant designs, featuring crystal-like elements, intricate details, and colors that match each fairy's signature palette.
The Mythix scepters play a crucial role in the Winx Club storyline, particularly when the fairies must navigate the Legendarium World and face the powerful witches. Each scepter is uniquely designed to reflect the personality and powers of its wielder. For instance, Bloom's scepter features fiery red and orange elements, while Stella's incorporates golden and yellow hues that reflect her sun and moon powers.
- Exclusive Lebron James Sons Real Age Revealed In Wild Scandal Must See
- Shocking Leak Tina Turners Secret Recordings Expose Ikes Brutal Abuse Youll Never See Her The Same Way Again
- Breaking Ed Geins Leaked Confessions Expose His Nude Rituals
Understanding the significance of these magical artifacts adds depth to the crafting process. When you create your own Mythix scepter, you're not just making a replica; you're connecting with a piece of Winx Club history and mythology. The attention to detail in the original designs reflects the careful thought that went into creating these magical items, making them perfect subjects for crafting enthusiasts.
Materials and Tools Needed for Scepter Making
Creating a Mythix scepter requires careful selection of materials to achieve that magical, ethereal look. The primary materials you'll need include:
- A sturdy base: PVC pipe or wooden dowel (typically 24-36 inches long, depending on your height and preference)
- Sculpting materials: Polymer clay or air-dry clay for creating intricate details
- Crystals and gems: Clear acrylic crystals, glass beads, or resin-cast gems
- Paints: Acrylic paints in your chosen colors, plus metallic paints for accents
- Adhesives: Strong craft glue, epoxy, or hot glue
- Finishing materials: Clear varnish or sealant, glitter, and decorative elements
The tools you'll need are equally important for achieving professional results. Essential tools include:
- Exposed Madea Movies Porn Leak Where To Find The Forbidden Streams Today
- Vanessa Nadals Secret Sex Tape Leaked Shocking Truth That Will Make You Cry
- Meghan And Lilibets Beekeeping Nightmare Leaked Photos Reveal Royal Scandal
- Cutting tools: Hacksaw or pipe cutter for the base material
- Sculpting tools: Clay modeling tools, shaping knives, and smoothing implements
- Painting supplies: Brushes of various sizes, paint mixing palette, and protective gear
- Sanding materials: Sandpaper in various grits for smoothing surfaces
- Measuring tools: Ruler, measuring tape, and templates for symmetry
When selecting materials, consider the durability and weight of your finished scepter. While polymer clay offers excellent detail and durability, it can add significant weight. For beginners, foam-based construction might be more manageable, though it requires different techniques for achieving the same level of detail.
Step-by-Step Construction Process
Creating your Mythix scepter involves several distinct phases, each requiring patience and attention to detail. Let's break down the process into manageable steps:
Phase 1: Planning and Design
Before you begin construction, research the specific Mythix scepter you want to create. Study reference images from the Winx Club series, noting the proportions, color schemes, and distinctive features. Create detailed sketches or even 3D models if you're comfortable with digital design tools. This planning phase is crucial for ensuring your final product matches your vision.
Phase 2: Base Construction
Start by preparing your scepter's core structure. Cut your chosen base material to the desired length, typically between 24 and 36 inches. Sand any rough edges and create a comfortable grip area if desired. This core will support all subsequent additions, so ensure it's sturdy and properly sized for your height and handling preferences.
Phase 3: Adding Structural Elements
Create the main body of your scepter by adding larger decorative elements. This might include the central crystal housing, wing-like structures, or other prominent features. Use foam, cardboard, or lightweight wood to create these elements, attaching them securely to your base with strong adhesive. Allow adequate drying time between attachments.
Phase 4: Sculpting Details
This is where your scepter truly comes to life. Use polymer clay or air-dry clay to sculpt intricate details like scrolls, vines, crystals, and other decorative elements. Work in sections, allowing each part to dry or cure before adding the next. Pay special attention to symmetry and proportion, as these details significantly impact the final appearance.
Phase 5: Painting and Finishing
Once all structural elements are complete and fully cured, begin the painting process. Start with a primer coat, then apply your base colors. Layer metallic paints for magical effects, and use dry brushing techniques to highlight raised details. Add glitter or shimmer effects where appropriate, and finish with a clear protective coating to preserve your work.
Advanced Techniques and Customization
For those looking to take their Mythix scepter to the next level, several advanced techniques can elevate your creation from impressive to extraordinary:
LED Integration: Adding small LED lights can create stunning glowing effects that mimic the magical energy of the original scepters. Small battery-powered LED strips or individual LEDs can be incorporated into crystal elements or along the scepter's length. This requires basic electronics knowledge and careful planning for battery placement and wiring concealment.
3D Printing Elements: If you have access to a 3D printer, you can create highly detailed components that would be difficult to sculpt by hand. This is particularly useful for intricate crystal shapes, complex geometric patterns, or repeated decorative elements. Many 3D modeling programs offer free versions suitable for creating custom scepter components.
Special Effects: Consider adding sound effects, motion sensors, or even smoke effects for truly magical results. Small sound modules can play magical sounds when the scepter is moved, while ultrasonic misters can create fog effects for dramatic presentations. These additions require more technical expertise but can create truly spectacular results.
Custom Design Elements: While staying true to the Winx Club aesthetic, don't be afraid to add personal touches that reflect your interpretation or connection to the character. This might include unique color combinations, additional symbolic elements, or modifications that improve functionality or comfort.
Common Mistakes and How to Avoid Them
Even experienced crafters encounter challenges when creating Mythix scepters. Being aware of common pitfalls can save you time, money, and frustration:
Weight Distribution Issues: Many beginners create scepters that are too heavy at the top, making them difficult to hold and potentially unstable. Always consider weight distribution during the planning phase, and test balance as you add elements. Consider hollowing out thick sections or using lighter materials for larger components.
Poor Material Choices: Using inappropriate materials can lead to structural failure or unsatisfactory results. Research each material's properties before committing to your design. For instance, some paints don't adhere well to certain plastics, and some adhesives can damage foam materials.
Rushing the Process: Creating a quality Mythix scepter requires patience. Rushing through drying times, skipping primer coats, or not allowing adequate curing time for adhesives will result in inferior quality. Plan your project timeline realistically, allowing several days to weeks depending on the complexity of your design.
Ignoring Safety Considerations: Working with tools, chemicals, and electrical components requires proper safety precautions. Always work in well-ventilated areas when using paints or adhesives, wear appropriate protective gear, and follow manufacturer instructions for all materials and tools.
Maintenance and Care for Your Creation
Once you've completed your Mythix scepter, proper care will ensure it remains beautiful and functional for years to come:
Storage Solutions: Store your scepter in a cool, dry place away from direct sunlight to prevent paint fading and material degradation. Consider creating a custom storage solution, such as a padded case or wall mount, to protect it from dust and accidental damage.
Cleaning Guidelines: Different materials require different cleaning approaches. Generally, use a soft, slightly damp cloth for routine cleaning. Avoid harsh chemicals or abrasive materials that could damage paint or delicate details. For stubborn dirt, consult material-specific cleaning guidelines.
Repair and Restoration: Over time, you may need to repair minor damage or refresh the appearance. Keep small amounts of your original materials and paints for touch-ups. Learn basic repair techniques for common issues like loose crystals, chipped paint, or bent elements.
Display Considerations: If you plan to display your scepter, consider environmental factors like humidity, temperature fluctuations, and exposure to light. UV-protective coatings can help preserve colors, while proper mounting can prevent warping or stress on delicate components.
The Community and Resources
The Winx Club crafting community is vibrant and supportive, offering numerous resources for both beginners and experienced creators:
Online Communities: Join forums, social media groups, and crafting communities dedicated to Winx Club and fantasy prop making. These spaces offer inspiration, troubleshooting help, and opportunities to share your work with fellow enthusiasts.
Tutorial Resources: Numerous video tutorials, blogs, and step-by-step guides are available online. YouTube channels dedicated to cosplay and prop making often feature Mythix scepter tutorials, while crafting blogs may offer more detailed written instructions with photographs.
Material Suppliers: Building relationships with reliable suppliers can make your crafting journey smoother. Many online retailers specialize in cosplay materials, offering everything from specialty paints to LED components. Local craft stores can also be valuable resources for materials and expert advice.
Workshops and Events: Consider attending crafting workshops or conventions where you can learn new techniques, see other creators' work, and connect with the community. Some events even offer specialized classes in prop making or fantasy crafting.
Conclusion
Creating your own Winx Club Mythix scepter is a rewarding journey that combines artistic expression, technical skill, and connection to a beloved franchise. Whether you're crafting for cosplay, display, or simply the joy of creation, the process offers opportunities for learning, creativity, and personal growth. Remember that perfection comes with practice, and each scepter you create will be better than the last as you develop your skills and refine your techniques.
The magical world of Winx Club continues to inspire new generations of fans, and by creating your own Mythix scepter, you're participating in a creative tradition that celebrates imagination, craftsmanship, and the enduring appeal of these enchanting characters. So gather your materials, plan your design, and embark on the magical journey of creating your very own Mythix scepter. The fairy world awaits your creative touch!