How To Unstick Your L2 Button On A PS5 Controller: A Complete Guide
Have you ever been in the middle of an intense gaming session when suddenly your L2 button on your PS5 controller becomes unresponsive or stuck? This frustrating issue can ruin your gaming experience and leave you wondering if you need to buy a new controller. The good news is that a stuck L2 button is often a fixable problem that you can resolve at home with some basic troubleshooting and cleaning techniques.
In this comprehensive guide, we'll walk you through everything you need to know about diagnosing and fixing a stuck L2 button on your PS5 controller. Whether you're dealing with sticky residue, debris buildup, or mechanical issues, we've got you covered with step-by-step instructions and practical solutions.
Understanding Your PS5 Controller's L2 Button
Before diving into the repair process, it's important to understand how the L2 button on your DualSense controller works. The L2 button is your controller's left trigger, designed to provide precise input for various in-game actions like aiming, accelerating, or activating special abilities. Unlike the face buttons, the L2 trigger uses a more complex mechanism involving a spring-loaded lever system that can be sensitive to dirt, debris, and wear over time.
- Beauty In Black Season 2 Part 2 Scandal The Sex Tape That Broke The Internet
- Breaking Ed Geins Leaked Confessions Expose His Nude Rituals
- Secret Document Exposes Which Presidents Are Still Alive Youll Never Guess Whos Hidden In Plain Sight
The DualSense controller is known for its advanced haptic feedback and adaptive triggers, which means the L2 button has more moving parts than traditional controller triggers. This complexity, while providing an enhanced gaming experience, also makes it more susceptible to certain issues that can cause the button to stick or become unresponsive.
Common Causes of a Stuck L2 Button
Understanding what causes your L2 button to stick is the first step in fixing it. Several factors can contribute to this problem:
Debris and Dirt Accumulation: Over time, dust, food particles, skin oils, and other debris can accumulate around the button mechanism. This buildup can interfere with the button's movement and cause it to stick.
- Explosive Leak Mission Impossible 1996 Casts Hidden Scandals Exposed
- You Wont Believe How Andrea Willer Beat The Odds Exclusive Lotto Leak Revealed
- Charlize Therons Shocking Secret Forcing Sons To Become Daughters Exposed
Liquid Damage: Spills or exposure to moisture can cause sticky residue to form around the button, making it difficult to press or causing it to stick in one position.
Wear and Tear: Regular use can cause the internal components of the trigger mechanism to wear down, potentially leading to misalignment or sticking issues.
Manufacturing Defects: In some cases, the problem may be due to a manufacturing defect that becomes apparent only after extended use.
Initial Troubleshooting Steps
Before attempting any repairs, start with these basic troubleshooting steps:
Power Cycle Your Controller: Sometimes, electronic glitches can cause buttons to behave erratically. Turn off your controller completely, wait 30 seconds, then turn it back on to see if the issue resolves.
Check for Software Issues: Ensure your PS5 system software and controller firmware are up to date. Outdated software can sometimes cause input problems.
Test in Different Games: Verify that the issue occurs across multiple games, not just one specific title. This helps determine if it's a controller hardware issue or a software problem.
Inspect for Visible Damage: Look for any obvious signs of physical damage, such as cracks, loose parts, or foreign objects around the button area.
Cleaning the L2 Button
One of the most effective solutions for a stuck L2 button is thorough cleaning. Here's how to do it safely:
Compressed Air Method:
- Turn off your controller and disconnect it from any power source
- Hold the controller with the L2 button facing downward
- Use short bursts of compressed air to blow out any loose debris
- Move the button back and forth while spraying to dislodge particles
Isopropyl Alcohol Cleaning:
- Power off the controller and remove any batteries if possible
- Dip a cotton swab in 70% isopropyl alcohol (never use water or other cleaning solutions)
- Gently clean around the edges of the L2 button
- Use a fresh swab to remove any excess alcohol
- Allow the controller to dry completely for at least 30 minutes before use
Deep Cleaning with Toothpick:
For stubborn debris:
- Power off the controller
- Wrap a small piece of cloth or paper towel around a toothpick
- Moisten with isopropyl alcohol
- Carefully clean around the button edges and any visible gaps
- Be extremely gentle to avoid damaging internal components
Disassembly and Internal Cleaning
If external cleaning doesn't resolve the issue, you may need to open the controller for internal cleaning. Warning: This will void your warranty and should only be attempted if you're comfortable with electronics repair.
Tools Needed:
- Small Phillips head screwdriver
- Plastic opening tools or guitar pick
- Anti-static work surface
- Isopropyl alcohol and cotton swabs
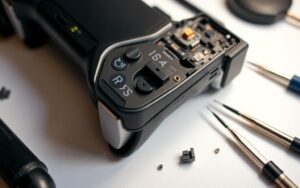
Steps for Internal Cleaning:
- Remove the four screws on the back of the controller
- Carefully separate the front and back housing using plastic tools
- Gently lift the circuit board to access the trigger mechanism
- Clean the L2 trigger mechanism with alcohol-dipped swabs
- Check for any broken or misaligned components
- Reassemble carefully, ensuring all parts are properly aligned
Adjusting the Trigger Mechanism
Sometimes, the L2 button sticks due to improper alignment or tension in the trigger mechanism. After cleaning, check if the trigger spring is properly seated and not damaged. If the spring appears weak or broken, it may need replacement.
Trigger Adjustment Tips:
- Ensure the trigger spring is properly positioned and not twisted
- Check that the trigger lever moves freely without obstruction
- Verify that the contact points are clean and properly aligned
- Test the button movement before final reassembly
When to Seek Professional Repair
If your DIY efforts haven't resolved the issue, it may be time to consider professional repair options:
Warranty Considerations: If your controller is still under warranty, contact Sony support before attempting any repairs. Unauthorized repairs will void your warranty.
Professional Repair Services: Many electronics repair shops specialize in gaming controller repairs and may offer more advanced solutions than DIY methods.
Replacement Parts: For severe damage, you might need to replace the entire trigger mechanism or specific components. These parts are available from electronics suppliers, but installation requires advanced skills.
Preventive Maintenance Tips
To avoid future L2 button sticking issues, consider these preventive measures:
Regular Cleaning Schedule: Clean your controller every few months, even if you don't notice any issues. This prevents buildup before it becomes a problem.
Proper Storage: Store your controller in a clean, dry place away from dust and direct sunlight when not in use.
Hand Hygiene: Wash your hands before gaming sessions to reduce the transfer of oils and dirt to your controller.
Avoid Eating/Drinking: Keep food and drinks away from your gaming area to prevent accidental spills and crumbs.
Use Controller Covers: Consider using silicone covers that protect your controller from dirt and debris while still allowing full button functionality.
Alternative Solutions
If cleaning and repair attempts fail, consider these alternatives:
Controller Replacement: Sometimes, replacement is more cost-effective than extensive repairs, especially for older controllers.
External Trigger Extensions: Some gamers use external attachments that can bypass problematic internal triggers.
Controller Mapping Software: As a temporary workaround, you might remap L2 functions to another button using PS5 accessibility settings or third-party software.
Conclusion
A stuck L2 button on your PS5 controller can be a frustrating experience, but in most cases, it's a fixable problem. By following the steps outlined in this guide—from basic troubleshooting to deep cleaning and potential disassembly—you can often restore your controller to full functionality without the need for expensive replacements.
Remember to start with the gentlest solutions first, work your way up to more involved repairs only if necessary, and always prioritize your controller's warranty status before attempting any modifications. With proper care and maintenance, your PS5 controller can provide years of reliable gaming performance.
If you've tried all these solutions and your L2 button still isn't working properly, don't hesitate to contact Sony support or a professional repair service. Sometimes, the issue may require specialized tools or replacement parts that aren't practical for home repair.
Have you experienced a stuck L2 button on your PS5 controller? What solution worked for you? Share your experiences in the comments below to help other gamers facing similar issues!