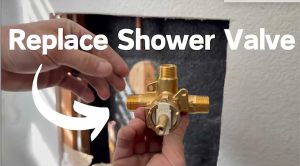
How To Replace A Shower Valve: A Complete Step-by-Step Guide
Is your shower valve leaking, causing inconsistent water temperature, or simply not working as it should? A faulty shower valve can turn your daily shower from a relaxing experience into a frustrating ordeal. But before you call a plumber and spend hundreds of dollars, you might be surprised to learn that replacing a shower valve is a manageable DIY project that can save you both time and money.
In this comprehensive guide, we'll walk you through everything you need to know about how to replace a shower valve, from identifying the type of valve you have to the final installation steps. Whether you're dealing with a dripping shower, temperature fluctuations, or simply want to upgrade your bathroom fixtures, this guide will provide you with the knowledge and confidence to tackle this home improvement project.
Understanding Shower Valves: Types and Functions
Before diving into the replacement process, it's essential to understand what a shower valve does and the different types available on the market.
- Nude Photo Leak Shatters Whos The Boss Cast Reunion Plans
- Porn Scandal Rocks Dancing With The Stars Wicked Nights Secret Footage Leaked
- Pam Bondis Nightmare What Trump Secretly Posted On Truth Social Has Everyone Talking
A shower valve is the heart of your shower system, controlling water flow and temperature. It's the mechanism behind your shower handle that mixes hot and cold water to deliver the perfect temperature to your showerhead. When functioning correctly, it provides consistent water pressure and temperature, but when it fails, you might experience leaks, temperature fluctuations, or complete loss of water flow.
There are several types of shower valves you might encounter:
Pressure-Balancing Valves: These maintain a consistent water temperature by balancing the pressure between hot and cold water lines. They're excellent for preventing sudden temperature changes when someone else in the house uses water.
Thermostatic Valves: These offer more precise temperature control by using a thermostat to maintain your desired water temperature, regardless of pressure changes in your plumbing system.
Diverter Valves: These direct water flow between different shower components, such as from a bathtub spout to a showerhead.
Mixing Valves: These simply mix hot and cold water to achieve the desired temperature without any pressure-balancing features.
Understanding which type of valve you have will help you select the correct replacement and ensure proper installation.
Tools and Materials You'll Need
Before starting your shower valve replacement project, gather all necessary tools and materials. Having everything ready will make the process smoother and more efficient.
Essential Tools:
- Adjustable wrench
- Screwdrivers (flathead and Phillips)
- Plumber's tape (Teflon tape)
- Pipe wrench
- Utility knife
- Drill with various bits
- Safety glasses
- Work gloves
- Flashlight or headlamp
Required Materials:
- Replacement shower valve (matching your existing setup)
- Plumber's putty
- Pipe fittings (if needed)
- Replacement washers and O-rings
- Cleaning supplies for old valve area
- Towels or rags
Optional but Helpful:
- Shower valve socket wrench
- Tubing cutter
- Soldering equipment (if working with copper pipes)
- Pipe thread sealant
Having the right tools and materials on hand will prevent interruptions during the replacement process and ensure a professional-quality installation.
Preparing for the Replacement
Proper preparation is crucial for a successful shower valve replacement. This phase involves shutting off the water supply, protecting your bathroom, and preparing the work area.
Step 1: Shut Off the Water Supply
The first and most critical step is to turn off the water supply to your shower. Locate the main water shut-off valve for your home or the dedicated shut-off valve for your bathroom. Turn it clockwise until it stops. Once the water is off, open the shower valve to release any remaining water pressure and verify that the water is indeed off.
Step 2: Protect Your Bathroom
Cover the shower floor and surrounding areas with drop cloths or old towels to protect against water damage and debris. Remove any personal items from the shower area and clear space for your tools and materials.
Step 3: Remove the Old Handle and Trim
Most shower handles are secured with a set screw that can be removed with an Allen wrench or screwdriver. Once the handle is off, you'll need to remove the trim plate or escutcheon. This might involve unscrewing it or carefully prying it off with a putty knife.
Step 4: Access the Valve
Depending on your shower setup, you may need to remove additional components to access the valve. Some installations have an access panel on the opposite side of the wall, while others require working directly through the shower wall. If you need to cut into the wall, measure carefully and use a drywall saw to create a clean opening.
Removing the Old Shower Valve
With the preparation complete, it's time to remove the old shower valve. This step requires careful attention to avoid damaging your plumbing system.
Step 1: Disconnect the Water Lines
Using an adjustable wrench, disconnect the hot and cold water supply lines from the valve. Be prepared for some water to spill out, so have towels ready. If the connections are stubborn, apply penetrating oil and let it sit for a few minutes before trying again.
Step 2: Remove the Valve Body
The valve body is typically secured to the plumbing pipes with threaded connections or compression fittings. Use a pipe wrench to carefully loosen these connections. If the valve is soldered in place, you'll need to use a propane torch to heat the joints until the solder melts, then carefully remove the valve.
Step 3: Clean the Pipe Ends
Once the old valve is removed, clean the pipe ends thoroughly. Use a wire brush or emery cloth to remove any corrosion, old solder, or debris. This step is crucial for ensuring a proper seal with the new valve.
Step 4: Inspect for Damage
Take this opportunity to inspect the surrounding pipes and connections for any signs of damage or corrosion. If you notice any issues, this might be the perfect time to replace sections of pipe or make other plumbing improvements.
Installing the New Shower Valve
Now that the old valve is removed, it's time to install the new one. This is where attention to detail will ensure a leak-free, properly functioning shower.
Step 1: Prepare the New Valve
Before installation, apply plumber's tape to all threaded connections on the new valve. This creates a watertight seal and prevents leaks. If your new valve uses compression fittings, ensure all components are properly aligned.
Step 2: Position the Valve
Place the new valve in position, ensuring it's oriented correctly with hot and cold water connections matching your plumbing setup. Most valves have indicators or color coding (red for hot, blue for cold) to help with proper orientation.
Step 3: Connect the Water Lines
Carefully connect the hot and cold water supply lines to the new valve. If you're working with threaded connections, tighten them securely but avoid over-tightening, which can damage the threads. For soldered connections, apply flux to the joints, fit the pieces together, and use a propane torch to heat the joint while applying lead-free solder.
Step 4: Secure the Valve Body
Most shower valves need to be secured to a support block or stud in the wall. Follow the manufacturer's instructions for proper mounting, ensuring the valve is level and at the correct depth for your trim kit.
Step 5: Test for Leaks
Before closing up the wall, it's crucial to test for leaks. Turn the water supply back on slowly and check all connections for any signs of water leakage. If you detect any leaks, tighten the connections or reapply plumber's tape as needed.
Reassembling and Testing Your Shower
With the new valve installed and tested, it's time to reassemble your shower and ensure everything works correctly.
Step 1: Reinstall the Trim and Handle
Once you're confident there are no leaks, reinstall the trim plate and handle according to the manufacturer's instructions. Apply plumber's putty around the trim plate if recommended to create a watertight seal against the wall.
Step 2: Install the Showerhead and Spigot
Reattach the shower arm and showerhead, applying plumber's tape to the threads. If you have a tub spout, reinstall it as well, ensuring it's properly sealed and secured.
Step 3: Final Testing
Turn the water supply back on fully and test your new shower valve. Check for:
- Proper water flow from both the showerhead and tub spout (if applicable)
- Consistent water temperature
- No unusual noises or vibrations
- Smooth operation of the handle
Run the shower for several minutes to ensure everything is working correctly and there are no hidden leaks.
Troubleshooting Common Issues
Even with careful installation, you might encounter some common issues. Here's how to address them:
Temperature Issues:
If the water temperature isn't consistent or doesn't reach the desired heat level, check that the valve is properly oriented and that the hot and cold water supplies are connected to the correct ports.
Low Water Pressure:
This could indicate a blockage in the new valve or a problem with your home's water pressure. Check the valve's filter screen for debris and ensure all supply valves are fully open.
Handle Doesn't Turn Smoothly:
If the handle is difficult to turn or doesn't move smoothly, the valve cartridge might not be properly seated. Remove the handle and trim to check the cartridge alignment.
Leaks at Connections:
If you notice leaks at threaded connections, turn off the water, disconnect the joint, apply new plumber's tape, and reconnect. For soldered joints, you may need to reheat and resolder the connection.
Maintenance Tips for Your New Shower Valve
To ensure your new shower valve lasts for years to come, follow these maintenance tips:
Regular Cleaning: Clean your shower valve and handle regularly to prevent mineral buildup, especially in areas with hard water.
Check for Leaks: Periodically inspect around the valve and connections for any signs of moisture or leaks.
Address Issues Promptly: If you notice any changes in water temperature, pressure, or unusual noises, address them promptly to prevent more significant problems.
Use Water Softener: If you have hard water, consider installing a water softener to reduce mineral buildup in your plumbing fixtures.
Professional Inspection: Every few years, consider having a professional plumber inspect your shower valve and overall plumbing system.
When to Call a Professional
While replacing a shower valve is a manageable DIY project for many homeowners, there are situations where calling a professional plumber is the best choice:
- If you're uncomfortable working with plumbing or lack the necessary tools
- When dealing with complex plumbing configurations or old, corroded pipes
- If you discover extensive water damage or mold behind the shower wall
- When working with specialized valves that require specific expertise
- If local building codes require professional installation for plumbing modifications
Remember, while DIY can save money, incorrect installation can lead to costly water damage and repairs.
Conclusion
Replacing a shower valve is a rewarding DIY project that can solve common shower problems and improve your daily bathing experience. By following this comprehensive guide, you've learned how to identify your valve type, gather the necessary tools and materials, remove the old valve, install the new one, and troubleshoot common issues.
The key to success is careful preparation, attention to detail during installation, and thorough testing before completing the project. With patience and the right approach, you can successfully replace your shower valve and enjoy a fully functional, leak-free shower for years to come.
Remember that while this guide provides detailed instructions, every shower setup is unique. Take photos before disassembly, consult your new valve's manufacturer instructions, and don't hesitate to seek professional help if you encounter challenges beyond your comfort level. Your newly replaced shower valve will provide reliable performance and enhance your bathroom's functionality, making those daily showers something to look forward to once again.