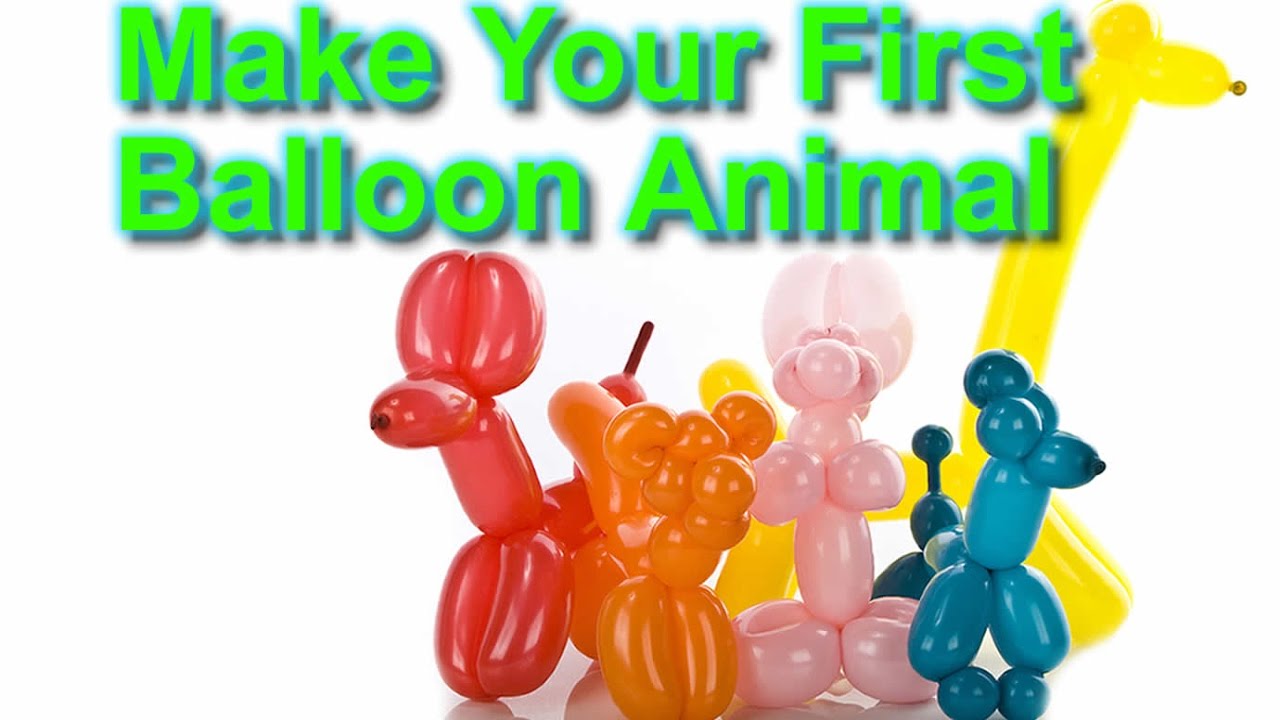
The Ultimate Guide To Making Dog Balloons: Master The Art Of Balloon Animals
Have you ever wondered how professional entertainers create those adorable dog balloons that delight children at parties? Balloon animals are a fascinating art form that combines creativity, precision, and a bit of practice. Whether you're planning a birthday party, want to impress your friends, or are considering a career in entertainment, learning how to make dog balloon creations is an excellent starting point.
Balloon animals have been entertaining people for decades, with the classic dog balloon being the foundation of this art form. Once you master the dog, you can create countless other animals by making simple variations. This comprehensive guide will walk you through everything you need to know about creating the perfect dog balloon, from selecting the right materials to mastering advanced techniques.
Understanding Balloon Animal Basics
Before diving into the step-by-step process of making a dog balloon, it's essential to understand the fundamentals of balloon art. Balloon animals require specific types of balloons, proper inflation techniques, and basic twisting methods that form the foundation of all balloon creations.
- Shocking Leaked Sex Tape Secrets Behind Todays Celebrity Death Revealed
- Boyfriends Sex Scandal Leaked Tapes Implicate Megan Thee Stallions Bf
- You Wont Believe This Mary Kate And Ashley Olsens Hidden Sex Scandal Finally Revealed
The most common balloon used for animal creations is the 260Q balloon, which is 2 inches in diameter and 60 inches long when fully inflated. These balloons are made from latex, a durable material that can withstand multiple twists without popping. Understanding the properties of your materials is crucial for success in balloon art.
Essential Materials and Tools
Creating impressive dog balloons starts with having the right supplies. Here's what you'll need to get started:
Quality balloons are the foundation of any balloon animal. Standard 260Q balloons come in various colors and are specifically designed for twisting. You'll also need a reliable hand pump to inflate your balloons, as mouth inflation is difficult and can introduce moisture that weakens the latex.
- Jared Fogles Secret Life Behind Bars Nude Photos And Porn Ring Leak Revealed
- Strongshocking Leak Love And Basketball Casts Private Messages Expose Hidden Romancesstrong
- Bobbi Kristina Browns Death Shocking Leak Exposes Hidden Truths
Additional helpful tools include a permanent marker for adding facial features, scissors for trimming excess material, and a balloon bag for organization. Having everything prepared before you begin will make the process much smoother and more enjoyable.
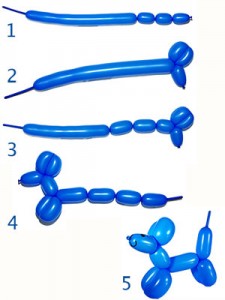
Step-by-Step Guide to Making a Basic Dog Balloon
Now let's dive into the process of creating your first dog balloon. This classic design is perfect for beginners and forms the basis for many other animal creations.
Step 1: Inflation - Begin by inflating your balloon, leaving about 3-4 inches uninflated at the end. This space is crucial for allowing the air to move during twisting. The tail end should remain soft to prevent popping.
Step 2: Creating the Head - Make a small bubble about 2 inches long for the nose, followed by a slightly larger bubble for the head. Lock these together by twisting them and folding the balloon at the twist point.
Step 3: Forming the Ears - Create two equal-sized bubbles for the ears, then twist them together at their base to form the dog's head shape. This technique, called a lock twist, is fundamental to balloon art.
Step 4: Making the Neck and Legs - Create a small bubble for the neck, then form two larger bubbles of equal size for the front legs. Use another lock twist to secure these in place.
Step 5: Completing the Body and Tail - Make a bubble for the body, followed by two more bubbles for the back legs. The remaining balloon becomes the tail. Adjust the proportions as needed for your desired look.
Common Mistakes and How to Avoid Them
Even experienced balloon artists encounter challenges. Here are some common issues and solutions to help you succeed:
Over-inflation is the most frequent mistake beginners make. An over-inflated balloon is more likely to pop and harder to twist. Always leave adequate uninflated space at the end. Uneven bubbles can make your dog look lopsided, so practice making consistent-sized bubbles by using your fingers as measuring guides.
Another common issue is bubbles untwisting themselves. To prevent this, always twist in the same direction and make your twists firm but not so tight that they stress the balloon material. If a bubble keeps coming undone, try making the twist closer to the base or using a double twist for added security.
Advanced Techniques and Variations
Once you've mastered the basic dog balloon, you can explore countless variations to expand your repertoire. Adding details like spots, collars, or accessories can transform a simple dog into a character. Use a permanent marker to draw eyes, spots, or other features after completing your balloon.
You can also experiment with different proportions to create various dog breeds. A Dalmatian might have a longer body and more spots, while a bulldog could have a shorter, wider head. Color choice also affects the final appearance - a black balloon creates a different impression than a brown or white one.
Safety Considerations and Best Practices
Balloon safety is crucial, especially when working with children. Always supervise balloon play, as popped balloons can pose a choking hazard. Use high-quality balloons designed for twisting, as cheaper alternatives are more likely to break and can be dangerous.
Store your balloons properly in a cool, dry place away from direct sunlight. Heat and UV exposure can weaken the latex over time. When disposing of popped balloons, ensure they're completely removed from areas where children or pets might find them.
Troubleshooting Common Problems
Even with proper technique, you might encounter issues. Here's how to address common problems:
If your balloon pops frequently, check your inflation level and twisting technique. Make sure you're not over-inflating and that your twists aren't too tight. Temperature can also affect balloon performance - very cold or hot conditions can make balloons more brittle.
For bubbles that won't stay twisted, ensure you're making your twists in the same direction and that they're tight enough. Sometimes, making a double twist (twisting twice in the same spot) provides extra security. If a particular section keeps failing, you might be putting too much stress on that area and need to adjust your design.
Practice Makes Perfect
Like any skill, balloon art requires practice to master. Don't get discouraged if your first attempts don't look perfect. Start with the basic dog design and practice until you can create it consistently. Then, gradually try more complex variations and different animals.
Consider practicing in front of a mirror to see how your creations look from different angles. You might also record yourself to analyze your technique and identify areas for improvement. Many professional balloon artists spend hours practicing basic twists before moving on to more complex designs.
Conclusion
Learning how to make dog balloon animals is a rewarding skill that can bring joy to countless people. From birthday parties to community events, your balloon creations can brighten someone's day and showcase your artistic abilities. Remember that every expert was once a beginner, so be patient with yourself as you develop this fun and creative skill.
With the right materials, proper technique, and plenty of practice, you'll soon be creating impressive dog balloons and other animal designs that amaze your friends and family. The key is to start with the basics, master the fundamental techniques, and then let your creativity guide you to more advanced creations. Happy twisting!