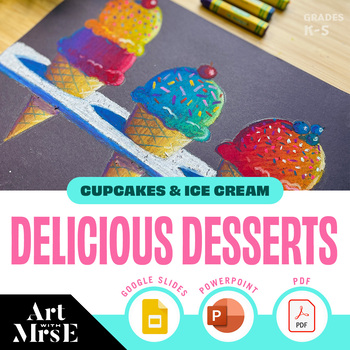
Mastering The Art Of Drawing Ice Cream: A Sweet Guide To Delicious Illustrations
Have you ever looked at a perfectly illustrated ice cream cone and wondered how artists create such mouthwatering, three-dimensional treats on paper? Drawing ice cream can be both fun and challenging, whether you're creating cute kawaii-style desserts or realistic gelato illustrations. In this comprehensive guide, we'll explore everything from basic shapes to advanced techniques that will help you create irresistibly sweet ice cream drawings that look good enough to eat!
Understanding the Basics of Ice Cream Structure
Before diving into the drawing process, it's essential to understand the basic structure of ice cream and how it's typically presented. Ice cream comes in various forms - cones, cups, sundaes, and popsicles - each with its own unique characteristics and challenges when it comes to illustration.
The most common ice cream drawing involves a classic cone with scoops of ice cream. A standard ice cream cone consists of a wafer or sugar cone base that's typically triangular in shape with a slightly curved bottom. The scoops sit atop this base, often stacked in a slightly unstable, melting arrangement that adds character to the drawing.
- Exposed Madea Movies Porn Leak Where To Find The Forbidden Streams Today
- Secret Document Exposes Which Presidents Are Still Alive Youll Never Guess Whos Hidden In Plain Sight
- Viral Scandal Cast Of Weapons Film In Porn Leak Revealed
Understanding the physics of ice cream is crucial - it melts, drips, and has a soft, billowy texture. These characteristics should be reflected in your drawings to make them appear realistic and appealing. The way ice cream curves, folds, and creates gentle peaks when scooped is what gives it that recognizable, tempting appearance.
Essential Tools and Materials for Ice Cream Drawing
To create stunning ice cream illustrations, you'll need the right tools. While you can draw ice cream with just a pencil and paper, having quality materials will significantly enhance your results.
Basic drawing supplies include graphite pencils (HB, 2B, and 4B), erasers (both kneaded and vinyl), and smooth drawing paper. For more vibrant illustrations, consider using colored pencils, markers, or watercolors. Digital artists can use drawing tablets and software like Procreate, Photoshop, or Clip Studio Paint.
- Does Justin Bieber Have A Kid Emotional Leak Reveals Hidden Family
- Strongleaked The Summer I Turned Pretty Season 3 Release Date Revealed But Why Is It So Controversialstrong
- Nude Photos From The Conjurings Real Investigation Leaked This Is 100 Real
For those interested in creating realistic textures, you might want to invest in blending stumps, tortillons, or even cotton swabs for smooth shading. A good quality eraser pen can help create highlights and fix small mistakes without damaging your paper.
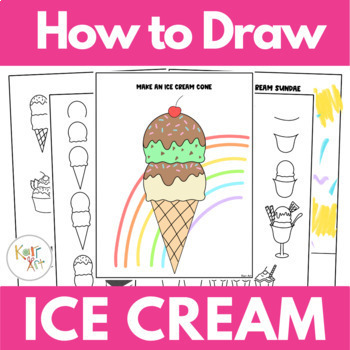
Step-by-Step Guide to Drawing a Classic Ice Cream Cone
Let's start with the most iconic ice cream drawing - the classic cone with scoops. Begin by sketching a light outline of your cone using simple geometric shapes. Draw a triangle for the cone body, but make it slightly curved rather than perfectly straight. Add a small oval at the bottom to represent the opening of the cone.
Next, draw the ice cream scoops. Start with the bottom scoop, making it slightly larger than the ones above it to create a natural, gravity-affected appearance. Ice cream scoops aren't perfect circles - they have gentle curves and sometimes appear slightly flattened where they rest on the cone. Add 2-3 scoops, making sure they overlap slightly and create a stable-looking stack.
Now it's time to add the characteristic details that make ice cream look realistic. Draw gentle curves on the scoops to show the ice cream's texture - these are usually subtle ridges that form when the ice cream is scooped. Add a slight drip or two coming down the sides of the scoops to create that just-served, slightly melting look that makes ice cream so appealing.
Creating Realistic Textures and Shadows
The key to making your ice cream drawing look realistic lies in the textures and shadows you create. Ice cream has a unique texture - it's smooth but not perfectly so, with tiny air bubbles and a slight sheen that makes it look cold and creamy.
To create this texture, use light, circular pencil strokes to build up the surface gradually. Avoid harsh lines, as ice cream has soft, blended edges. For colored drawings, layer your colors gradually, starting with lighter shades and building up to darker areas where shadows naturally fall.
Shadows are crucial for creating dimension. The area where the scoops meet the cone will have the darkest shadow, as will the undersides of each scoop. However, ice cream also has reflective qualities, so leave some areas lighter to show where light hits the surface. This contrast between light and shadow is what makes your drawing pop off the page.
Exploring Different Ice Cream Styles and Variations
Once you've mastered the basic ice cream cone, you can explore various styles and presentations. Kawaii-style ice cream drawings feature cute, simplified faces and exaggerated features, making them perfect for stickers, cards, or social media content. These often have large, sparkling eyes, small mouths, and rosy cheeks that give the ice cream a friendly, approachable personality.
Realistic ice cream illustrations require more attention to detail and often involve studying reference photos of different ice cream flavors and textures. Each flavor has unique characteristics - chocolate might have a matte finish with slight texture variations, while vanilla often appears smoother and more uniform.
You can also draw ice cream sundaes with toppings like whipped cream, cherries, sprinkles, and chocolate sauce. These additions create more complex compositions and allow you to practice drawing different textures and materials, from the glossy sheen of chocolate sauce to the fluffy texture of whipped cream.
Adding Color to Your Ice Cream Drawings
Color brings your ice cream drawings to life and makes them truly mouthwatering. When adding color, consider the flavor you're depicting and choose appropriate color palettes. Classic flavors like vanilla, chocolate, and strawberry have distinctive color profiles that people instantly recognize.
For digital coloring, use layers to build up your colors gradually. Start with a base color, then add shadows and highlights on separate layers. This technique gives you more control and allows for easy adjustments. For traditional media, layer your colors carefully, using light pressure and building up gradually to avoid creating harsh lines.
Don't forget about the cone! A realistic cone has variations in color - typically a light golden-brown with darker areas where it's been baked. Add subtle texture lines to suggest the waffle pattern and create dimension through shading.
Common Mistakes to Avoid When Drawing Ice Cream
Many beginners make similar mistakes when drawing ice cream for the first time. One common error is making the scoops too perfect or symmetrical. Real ice cream scoops are irregular and have natural variations in shape and texture.
Another mistake is neglecting the cone's structure. The cone isn't just a simple triangle - it has thickness, a slight curve, and often a pattern or texture. Pay attention to these details to create a more convincing drawing.
Overworking your drawing is another common pitfall. Sometimes less is more when it comes to creating the soft, inviting appearance of ice cream. Avoid adding too many details or making your lines too harsh, as this can make the ice cream look hard or unnatural.
Advanced Techniques for Professional-Looking Results
To elevate your ice cream drawings to a professional level, consider incorporating advanced techniques like atmospheric perspective and careful composition. Create depth by making objects in the background slightly lighter and less detailed than those in the foreground.
Experiment with different angles and perspectives. Instead of always drawing ice cream straight-on, try a slightly tilted view or even a dramatic overhead perspective. These different viewpoints can make your drawings more dynamic and interesting.
Consider the background and context of your ice cream drawing. Is it sitting on a table with other desserts? Is it being held in a hand? Adding these contextual elements can make your illustration more engaging and tell a story.
Digital Tools and Software for Ice Cream Illustration
If you're working digitally, there are numerous tools and software options that can help you create stunning ice cream illustrations. Procreate is excellent for iPad users, offering a wide range of brushes and easy-to-use layering systems. Photoshop provides more advanced features for those who need precise control over their illustrations.
Many digital artists create custom brushes that mimic traditional media textures, which can be particularly useful for creating realistic ice cream surfaces. Experiment with different brush settings to find what works best for your style.
Digital tools also allow for easy color adjustments and corrections, making it simpler to achieve the perfect color balance and lighting effects in your ice cream drawings.
Conclusion
Drawing ice cream is a delightful artistic journey that combines technical skill with creative expression. Whether you're creating cute kawaii designs or realistic dessert illustrations, the key is to observe carefully, practice regularly, and don't be afraid to experiment with different styles and techniques.
Remember that every artist develops their unique approach to drawing ice cream, so use these guidelines as a starting point rather than strict rules. With patience and practice, you'll be creating mouthwatering ice cream illustrations that capture the joy and sweetness of everyone's favorite frozen treat. So grab your drawing tools, choose your favorite ice cream flavor, and start creating delicious art that's sure to impress!