Building Your Own ESP32 DIY Radio: A Complete English Guide
Have you ever dreamed of creating your own DIY radio using the powerful ESP32 microcontroller? In today's world of smart devices and IoT, building your own radio receiver might seem like a throwback to simpler times, but it's actually an exciting project that combines retro technology with modern electronics. Whether you're a hobbyist, student, or electronics enthusiast, creating an ESP32-based radio is a rewarding project that teaches you about wireless communication, signal processing, and embedded systems.
The ESP32 is a remarkable piece of hardware that has revolutionized DIY electronics projects. With its dual-core processor, built-in Wi-Fi and Bluetooth capabilities, and affordable price point, it's become the go-to choice for makers worldwide. But can it really function as a radio? Absolutely! In this comprehensive guide, we'll walk you through everything you need to know about building your own ESP32 DIY radio in English, from the basic components to the final working product.
What Makes ESP32 Perfect for DIY Radio Projects
The ESP32's versatility makes it an ideal platform for radio projects. Unlike traditional microcontrollers, the ESP32 offers built-in Wi-Fi and Bluetooth capabilities, which means you can create radios that connect to internet radio stations, stream audio over networks, or even function as traditional FM receivers. Its powerful processor can handle real-time audio processing, and its extensive GPIO pins allow for connecting various components like displays, buttons, and audio output devices.
- Shocking Contamination Found In Cal Yee Farm Dark Chocolate Stop Eating Now
- Explosive Leak Mission Impossible 1996 Casts Hidden Scandals Exposed
- Does Justin Bieber Have A Kid Emotional Leak Reveals Hidden Family
One of the biggest advantages of using ESP32 for radio projects is its community support. Thousands of makers have already explored ESP32 applications, creating libraries, sharing code, and documenting their projects online. This wealth of shared knowledge means you're never alone when tackling a DIY radio project – you can always find examples, troubleshooting tips, and inspiration from others who have walked the same path.
Essential Components for Your ESP32 Radio
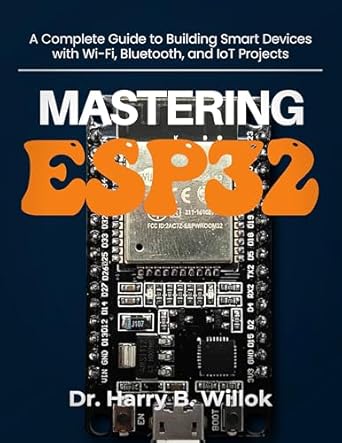
Before diving into the build process, let's explore what you'll need for your ESP32 DIY radio project. The core component is, of course, the ESP32 development board. You can choose from various models like the ESP32 DevKit, ESP32-WROOM, or even the ESP32-S2 if you want the latest features. Each has its own advantages, but for most radio projects, the standard ESP32 DevKit works perfectly.
For audio output, you'll need a DAC (Digital-to-Analog Converter) or a dedicated audio amplifier module. The ESP32 has built-in DACs, but for better sound quality, many builders opt for external audio modules like the PCM5102 or MAX98357. These provide superior audio fidelity and often include built-in amplifiers, saving you from having to design your own audio circuitry.
- Trolls Movies Sex Scandal Leak How Many Films Are They Hiding From You
- Gary Colemans Secret Sex Tape Leaked Linked To His Sudden Death
- Shocking Leak Tina Turners Secret Recordings Expose Ikes Brutal Abuse Youll Never See Her The Same Way Again
Don't forget about the user interface! A small LCD display helps you navigate stations and see what's playing. Popular choices include the SSD1306 OLED displays or ST7789 TFT displays. You'll also want some tactile buttons or a rotary encoder for station selection and volume control. Finally, consider adding a battery management circuit if you want your radio to be portable – the ESP32 can run on batteries, but you'll need proper charging and protection circuitry.
Understanding the Software Architecture
The software side of your ESP32 DIY radio is just as important as the hardware. You'll be working with the Arduino IDE or PlatformIO, both of which have excellent support for ESP32 development. The Arduino ecosystem is particularly beginner-friendly, with thousands of libraries available for various functions.
For internet radio functionality, you'll need libraries that can handle network protocols and audio streaming. The ESP8266Audio library (despite its name, it works great with ESP32) is a popular choice for playing various audio formats over the network. You'll also need WiFi libraries to connect to your network and HTTP client libraries to fetch radio streams.
If you're building an FM radio receiver, you might use the SI4730 or SI4735 libraries, which interface with dedicated FM radio chips. These libraries handle the complex task of tuning to stations, decoding FM signals, and providing audio output. The ESP32 then acts as the controller, managing the user interface and audio routing.
Step-by-Step Assembly Guide
Let's walk through the assembly process for your ESP32 DIY radio. Start by connecting your ESP32 board to your computer via USB and ensuring it's recognized by your development environment. Upload a simple test sketch to verify everything is working correctly – this could be something as basic as blinking an LED or displaying text on your screen.
Next, connect your audio output module. If you're using a DAC module like the PCM5102, connect the I2S pins (BCLK, DIN, LRC) from your ESP32 to the corresponding pins on the DAC. Then connect the DAC's analog outputs to your amplifier or directly to headphones/speakers. If you're using a Class D amplifier module like the MAX98357, the connections are even simpler – just connect the I2S pins and power.
For the display, connect it according to its interface type. I2C displays like the SSD1306 require only two data pins (SDA and SCL) plus power, while SPI displays need more pins but offer faster performance. Connect your buttons or rotary encoder to GPIO pins, making sure to use appropriate pull-up or pull-down resistors as needed.
Programming Your ESP32 Radio
Now comes the exciting part – programming your radio! Start with a basic sketch that initializes all your components: WiFi connection, display, buttons, and audio output. Create functions to handle button presses, update the display, and manage WiFi connectivity. This foundation will serve as the backbone of your radio application.
For internet radio functionality, you'll need to implement station management. Create a list or array of radio station URLs, along with their names and possibly their streaming formats. Implement functions to connect to a station, start streaming, handle buffering, and gracefully handle network interruptions. Add volume control by adjusting the audio output level through your DAC or amplifier module.
If you're including FM radio capabilities, integrate your FM radio library and create functions to scan for available stations, tune to specific frequencies, and display signal strength. You might also want to add RDS (Radio Data System) support if your FM module supports it, allowing you to display station names and song information.
Advanced Features and Customization
Once you have the basic functionality working, consider adding advanced features to enhance your ESP32 DIY radio. Sleep modes can significantly extend battery life by putting the ESP32 into low-power states when not actively playing audio. Implement automatic sleep after a period of inactivity and wake-up functions using buttons or scheduled alarms.
Presets and favorites are essential for a good user experience. Allow users to save their favorite stations with a simple button combination, and provide easy navigation through saved presets. You could even implement a rotary encoder with a push button for intuitive station selection and volume control.
Consider adding visual feedback through your display. Show album art when available, display song titles and artist information, and provide visual indicators for WiFi signal strength, battery level, and audio levels. Some builders add RGB LED indicators for power status and other functions, creating a more polished and professional appearance.
Troubleshooting Common Issues
Even with careful planning, you might encounter some challenges during your ESP32 DIY radio project. One common issue is audio quality problems, which can stem from incorrect I2S configuration, insufficient power supply, or interference from other components. Ensure your power supply provides adequate current (at least 500mA for basic setups, more for amplified audio) and use proper decoupling capacitors near your audio modules.
Network connectivity issues can be frustrating. If your radio struggles to connect to WiFi or experiences dropouts during streaming, try moving your router closer, using a 2.4GHz network (which has better range than 5GHz), or implementing better error handling in your code to automatically reconnect when connections drop.
Display problems often relate to incorrect wiring or library conflicts. Double-check your connections against the display's datasheet, ensure you're using the correct library for your specific display model, and try different I2C addresses if your display isn't responding. Sometimes simply restarting your ESP32 or re-uploading your code can resolve mysterious display issues.
Power Management and Battery Life
If you're building a portable ESP32 radio, power management becomes crucial. The ESP32 can draw significant current, especially during WiFi transmission and audio playback. For battery-powered operation, consider using a lithium-ion battery with a proper charging circuit. The TP4056 module is a popular choice for simple charging, while more sophisticated battery management systems offer protection against over-discharge and short circuits.
Implement deep sleep modes in your code to conserve power when the radio isn't in use. The ESP32 can enter deep sleep drawing microamps of current, waking up quickly when a button is pressed or on a timer. Calculate your expected battery life based on your power consumption and battery capacity – a 1000mAh battery might last 5-10 hours depending on your usage patterns and power management implementation.
Consider adding a battery level indicator to your display or through LED indicators. This helps users know when to recharge and prevents unexpected shutdowns. You can measure battery voltage through one of the ESP32's ADC pins, though you'll need to account for the ESP32's reference voltage and any voltage divider you use for safe measurement.
Expanding Your Radio's Capabilities
Once your basic ESP32 DIY radio is working well, think about expanding its capabilities. Bluetooth audio streaming allows you to connect your radio to Bluetooth speakers or headphones, adding wireless flexibility. The ESP32 has built-in Bluetooth, making this a natural extension of your project. You could also add USB audio support, allowing connection to USB sound cards or flash drives for local audio playback.
Internet integration opens up exciting possibilities. Connect your radio to online services like Spotify (though this requires more complex authentication), weather services for audio weather reports, or even create a smart home controller that responds to voice commands received over the radio. Some makers integrate their radios with home automation systems, allowing control through smartphone apps or voice assistants.
Consider adding multi-room audio synchronization if you build multiple units. This allows several ESP32 radios to play the same audio in sync throughout your home, creating a whole-house audio system. This requires network time synchronization and careful audio buffering but can create a truly impressive DIY audio solution.
Conclusion
Building an ESP32 DIY radio is more than just a fun electronics project – it's an educational journey that teaches you about wireless communication, embedded systems, audio processing, and user interface design. Whether you're creating a simple internet radio, a sophisticated FM receiver, or a multi-functional audio device, the ESP32 provides the perfect platform for your creativity.
The beauty of DIY projects is that they can be as simple or complex as you want. Start with a basic internet radio that streams your favorite stations, then gradually add features like FM reception, Bluetooth connectivity, or even custom-designed enclosures. The skills you learn – programming, circuit design, troubleshooting – will serve you well in future projects.
Remember that the maker community is here to support you. Share your progress, ask questions when you're stuck, and contribute your own solutions and improvements. Your ESP32 DIY radio project might inspire others to start their own journey into electronics and programming. So gather your components, fire up your development environment, and start building the radio of your dreams – the perfect blend of retro charm and modern technology, all powered by the versatile ESP32.